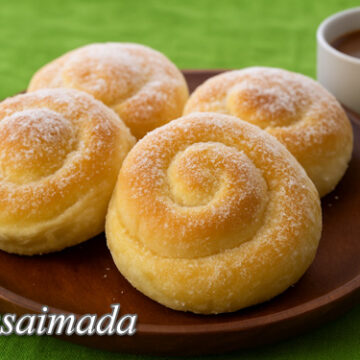
Ensaymada or ensaimada is a favorite and popular Filipino fluffy bread coated with margarine and butter. Usually the shape is round and resembles a bloated pancake. But some are shaped like large muffins. They are many varieties of ensaymada nowadays especially the commercial ones sold in big bakeshops.
Some are loaded with grated cheese and coated with butter, some has filling inside and some have different flavors like ube. But the original ensaymada with it’s plain sugar and margarine coating will always be the favorite.
Ensaymada Recipe: A Sweet Taste of Home
If there’s one merienda that instantly brings me back to my childhood, it’s ensaymada. I remember coming home from school in Bulacan and being greeted by the smell of freshly baked bread from my Lola Nena’s kitchen. She’d always say, “Mainit pa, kain ka na,” while setting down a plate of soft, pillowy rounds brushed with butter and sprinkled with sugar. Sometimes, if we were extra lucky, she’d grate a generous layer of cheese on top. It was simple, but to me, it tasted like love wrapped in bread.
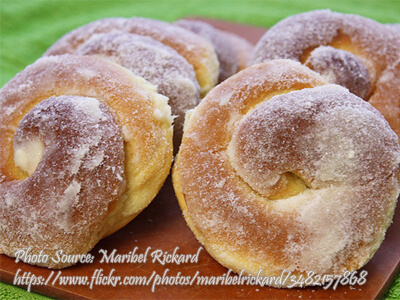
Years later, when my cousin Liza moved to Cebu, she learned a slightly different way of shaping the bread. Instead of the flat, round version we grew up with, she would roll hers into tight coils using the jelly-roll method. She swore it gave the pastry a more tender crumb because the layers baked into each other. And you know what? She was right. That’s the beauty of this Filipino classic—every household has its own twist, but the heart of the recipe remains the same.
The Story Behind Ensaymada
Many people don’t know that this beloved bread has Spanish roots. The original “ensaimada” from Mallorca, Spain, used lard (called “saim” in Catalan) as the main fat, which gave it a distinct richness. When it reached the Philippines during the Spanish colonial period, bakers adapted it using margarine and butter, which were easier to find locally. From there, the bread slowly evolved into the Filipino-style ensaymada we know today—softer, fluffier, and often loaded with cheese.
It’s amazing how a recipe travels across oceans and centuries, yet still manages to land on our tables in a form that feels uniquely ours.
The Secret to Soft and Fluffy Bread
When I first tried making this at home, I thought it would be complicated. But my Uncle Benjie, who used to help in a bakery in Pampanga, gave me one important piece of advice: be patient with the sponge yeast. Allowing the yeast mixture to sit until it bubbles not only activates the yeast but also develops better flavor in the bread. Rushing this step, he said, would result in dense rolls instead of the cloud-like texture we all crave.
Another trick I learned from him is kneading. It’s tempting to stop early when the dough feels sticky, but giving it a good knead builds gluten, which creates that fine, elastic texture. If the dough springs back when you poke it lightly, that’s when you know you’ve done enough.
Step-by-Step Guide to Making Ensaymada
To begin, dissolve sugar in warm water and stir in the yeast. Let this sit until it softens and foams. This becomes your sponge, the foundation of your bread. In a separate bowl, cream butter and sugar until smooth, then beat in salt and egg yolks one at a time. The addition of milk makes this mixture richer and gives the bread a tender bite.
Gradually blend this into the sponge with flour until a dough forms. After kneading, let the dough rest and rise for a couple of hours. This waiting period is crucial—it’s what gives the bread its light and airy texture. Once the dough has risen, roll it thinly, spread melted butter, sprinkle cheese, and shape it into a coil. That rolling technique not only adds flavor but also ensures a beautiful swirl when you bite into it.
Place the rolls in greased molds, allow them to rise again, and bake until golden. Finally, while they’re still warm, brush with butter and sprinkle with more cheese and sugar.
Why This Recipe Works
The combination of two rises—first after kneading and second after shaping—creates maximum fluffiness. Butter enriches the dough, while the egg yolks give it a beautiful color and soft texture. The final brushing of butter seals in moisture and helps the sugar stick, giving that irresistible sweet-salty finish.
This is why ensaymada never goes out of style. Each bite is a contrast of textures: the soft bread, the creamy butter, the grainy sugar, and the salty cheese.
A Treat for All Occasions
These days, you’ll find modern versions in big bakeshops, from ube-flavored to ones stuffed with ham or custard. But for me, nothing beats the classic—just butter, sugar, and cheese. It’s the same version my Lola served on rainy afternoons, the same one my cousin bakes for Christmas pasalubong, and the same one I now make for my own kids when they ask for something comforting.
Ensaymada is more than just bread. It’s a shared memory, a taste of family, and a reminder that sometimes, the simplest recipes are the ones that stay with us the longest.
How to Make Ensaymada
Ingredients
- 1 cup all-purpose flour (for the sponge yeast)
- 1 1/2 teaspoons sugar
- 3/4 cup warm water
- 4 tsp. active dry yeast
- 1/8 cup butter softened
- 3/4 cup sugar
- 1 Tbsp. salt
- 5 egg yolks
- 1 cup fresh milk or evaporated milk
- 4 cups all-purpose flour (for the dough)
- melted butter for brushing
- grated cheese
Instructions
How to Make Ensaymada:
- Dissolve the sugar in the warm water. Add the yeast and let stand until softened
- Add 1 cup flour gradually until well blended. Cover bowl with a damp cloth and set aside in warm place for 30 minutes. (This is the sponge yeast).
- Meanwhile, cream butter and sugar thoroughly; add salt and egg yolks, beating well after each addition. Then add milk and stir.
- Add 4 cups all-purpose flour gradually, blending well. Add this mixture to the sponge yeast. Mix well until dough is formed.
- Knead the dough until texture becomes fine.
- Put dough in slightly greased bowl and cover with a damp cloth and let rise in a warm place for 2 hours.
- Punch down. Divide dough into desired size of rolls. Sprinkle with flour to avoid sticking to the surface. Roll out thinly into a rectangle.
- Spread dough surface with melted butter and sprinkle with grated cheese.
- Roll as in jelly roll, starting from the lower left hand corner creating a long, thin log then shape it into a coil (spiral) with the end tucked under.
- Place in greased ensaimada molds. Let rise for 2 hours.
- Bake in preheated oven at 400 °F for from 10 to 15 minutes.
- After taking out from oven, brush with butter and sprinkle with grated cheese and sugar.
- Yield: 2 dozens.
Notes
Cooking Tips of Ensaymada Recipe:
Be Patient with the Sponge Yeast
Letting the sponge yeast rest until it bubbles ensures the yeast is fully activated and ready to make the dough rise properly. If you rush this step, your bread may turn out dense instead of light and airy. A well-developed sponge gives your ensaymada that signature fluffy texture.Knead Until Smooth and Elastic
Kneading builds gluten in the dough, which is key to creating a soft yet stretchy crumb. Don’t stop kneading too early—even if the dough feels sticky—because it needs time to develop structure. You’ll know it’s ready when the dough bounces back when lightly pressed.Give Enough Time for Rising
Allowing the dough to rise twice makes all the difference in the final product. The first rise develops flavor and texture, while the second rise adds lightness before baking. Skipping or shortening these steps can result in flat, heavy rolls instead of pillowy ensaymada.


")
#2 & #4 instruction is confuse me. There’s 2 all purpose flour in ingredients. Which one is for #2 & #4?. Please clarify. Thanks
Hi Amm, I’ve corrected the recipe already. Hope this helps.
Can I use instant dry yeast?
Hi Marisol, yes you can use instant dry yeast.
Hi! Can I use bread flour instead of all purpose flour? Will there be any bad effect on the dough (or the bread itself) if I use bread flour?
Hi Ness, yes you can use bread flour and there will be no bad effect.
Do I have to do #1 if I’m going to use instant yeast?
HI Ness, yes I think you do #1 but less time is needed. Maybe 20 minutes instead of 30 minutes on step no.2
So did you mean 1 cup of milk or a can of evaporated milk instead of 1 cup flour?
Hi Gina, the 1 cup all purpose flour is for making the sponge yeast. The other 4 cups is for the dough. Please read the instructions. Thanks!
Is this dough supposed to be wet? I finished step 4 and it is wet. You do not mention kneading the dough of adding more flour. What should I do?
HI Lourdes, yes the dough is suppose to be sticky. And I corrected and ad more detail on the recipe instructions. I hope this helps.
My first time with ensaymada. Butter and cheese are also inside the bread dough? Not just in top at the end? What happens if I skip the sponge yeast and go right to the dough?