
This is a very simple and basic recipe of polvoron. It’s up to you if you want to add nuts or toasted rice (pinipig) to make this a special polvoron. All-purpose flour is commonly used in making polvoron but you can also use cassava flour. To see the complete recipe with lists of ingredients in exact measurements, continue reading.
A Simple Filipino Treat That Never Feels Too Fancy
There’s something wonderfully nostalgic about homemade polvoron. It’s simple, crumbly, milky, and sweet, with that unmistakable toasted flavor that makes you reach for another piece before you’ve even finished the first.
Unlike many baked cookies, this Filipino shortbread doesn’t require an oven. You toast the flour in a skillet, combine it with sugar and powdered milk, then bind everything together with melted butter. The hardest part is really knowing when the flour is toasted enough and getting the mixture to the right consistency for molding.
I like this recipe because it’s forgiving once you understand what to look for. If you’re making it for the first time, don’t worry if your first few pieces aren’t perfectly shaped. Mine certainly weren’t. The important thing is getting that delicate, melt-in-your-mouth texture.
What Makes Polvoron Different From Regular Shortbread
Polvoron has Spanish roots, and its name comes from the Spanish word “polvo,” meaning powder or dust. The name makes sense once you crumble a piece between your fingers. Traditional Spanish polvorón is associated with crumbly shortbread-style sweets, while the Filipino version developed its own familiar character with ingredients such as powdered milk.
In the Philippines, these little treats are commonly enjoyed as snacks, desserts, pasalubong, and homemade gifts. They’re also a familiar sight during celebrations, when individually wrapped pieces can fill a tray or jar.
The basic mixture is quite humble: flour, sugar, powdered milk, and butter. But those few ingredients create plenty of room for variation. Some home cooks add nuts, while others mix in toasted pinipig for extra texture and flavor.
Toast the Flour Slowly for Better Flavor
The first step is also the one I pay the most attention to. Toast the all-purpose flour in a dry skillet over low to medium heat until it develops a light brown color.
Don’t turn the heat up simply because you want to finish faster. Flour can go from pleasantly toasted to scorched surprisingly quickly, especially around the edges of the pan. Stir it regularly and scrape the bottom as you go so the heat is distributed evenly.
You’ll notice the raw flour smell gradually changing into a warmer, slightly nutty aroma. That’s one of the easiest signs that you’re on the right track. The color should become lightly golden or tan, not dark brown.
This step matters because gently toasting the flour removes the raw taste and adds depth. It also gives the finished treat its characteristic roasted flavor. If the flour burns, unfortunately, there’s not much butter or sugar can do to hide that bitterness.
Once toasted, let the flour cool before continuing. Adding the other ingredients while it’s still very hot can affect the texture of the mixture.
Getting the Mixture Ready
While the flour cools, combine the sugar and powdered milk. Mixing these dry ingredients first helps distribute the sweetness and milk flavor more evenly throughout the finished mixture.
Add the cooled toasted flour and stir everything together. At this stage, the mixture will still look dry and sandy. That’s exactly what you want.
Next comes the melted butter.
I usually add it gradually rather than dumping everything in at once. Stir as you go and watch how the mixture changes. The dry ingredients will begin to come together, and when you squeeze a little between your fingers, it should hold its shape.
This is where beginners sometimes get nervous because the mixture doesn’t look like cookie dough. It shouldn’t. Polvoron has a loose, sandy consistency rather than a soft dough.
If you add too much butter, the finished pieces can become greasy and lose that delicate, crumbly texture. If there isn’t enough, they may refuse to hold together when molded. The goal is a mixture that compresses firmly but still breaks apart easily when bitten.
The Trick to Shaping Polvoron Without Frustration
A polvoron molder makes shaping much easier, but there’s a little technique involved. Fill the mold generously, then press the mixture down firmly before releasing it.
Don’t just scoop the mixture into the mold and expect it to stay together. Compression is what gives these crumbly sweets enough structure to hold their shape.
If the mixture falls apart as soon as you remove the mold, press it more firmly and check whether the butter was incorporated evenly. Sometimes the problem isn’t the amount of butter at all. A pocket of dry flour hiding in the mixture can make one piece crumble while another holds perfectly.
Work over a plate or tray so the pieces have somewhere soft to land. And don’t be discouraged by a few cracked pieces. They still taste just as good.
Easy Ways to Make Polvoron Your Own
The basic recipe is delicious on its own, but this is also where you can have some fun. Chopped nuts can add a pleasant crunch, while toasted pinipig gives the mixture a distinctly Filipino touch.
If you’re adding extras, keep the pieces relatively small. Large chunks can make the mixture difficult to compress and may cause the molded pieces to crack.
You can also experiment with the amount of sweetness to suit your family. Just remember that changing the dry ingredients can slightly affect the texture, so make adjustments gradually.
For a first batch, though, I recommend keeping things simple. Once you’ve learned how the basic mixture should feel, experimenting becomes much easier.
Why Homemade Polvoron Can Crumble Too Much
The most common problem is probably a mixture that won’t hold its shape. Usually, this comes down to insufficient butter, uneven mixing, or not compressing the mixture firmly enough in the mold.
Another issue is flour that was toasted too aggressively. Aside from the bitter taste, heavily browned flour can make the final flavor overpowering.
There’s also no need to rush the molding process. If the mixture feels unusually warm because of the melted butter, give it a little time to cool. Working with a cooler mixture can make it easier to handle and shape.
Once you get a feel for the texture, you’ll start making these adjustments almost automatically.
Wrapping and Storing Your Homemade Treats
Once shaped, the pieces can be wrapped individually in cellophane. This isn’t necessary if you’re serving them at home, but it makes them especially nice for gifting or sharing.
Handle them gently because their crumbly texture is part of their charm. Store the finished treats in an airtight container away from moisture. Humidity can soften the texture and take away some of that pleasant crumble.
This is one reason I prefer making smaller batches when the weather is particularly humid. Freshly made pieces have a texture that is difficult to beat.
A Little Food for Thought
What I find most interesting about polvoron is how such a modest list of ingredients can become closely tied to memories. It’s the kind of sweet that often shows up in Filipino homes during birthdays, holidays, family gatherings, or as something packed into a small container for someone special.
It also shows how recipes change as they travel. The Filipino version carries a Spanish culinary influence but has become its own familiar snack, especially with ingredients and variations that reflect local tastes.
That’s the beauty of home cooking. A recipe doesn’t have to stay exactly the same forever. One family might prefer it plain, another might add nuts, and someone else might swear by toasted pinipig.
Why This Recipe Is Worth Trying
This polvoron recipe is a good starting point if you’re new to making Filipino sweets because there’s no complicated baking technique involved. Pay attention to the flour, mix the ingredients thoroughly, and learn to recognize the right texture before molding.
The first batch is really about getting familiar with the process. Once you know what lightly toasted flour smells like and how the butter changes the dry mixture, the whole thing becomes much less intimidating.
And when you finally unmold a perfectly shaped piece, only to watch it practically melt in your mouth, you’ll understand why this humble Filipino shortbread has remained such a beloved homemade treat.
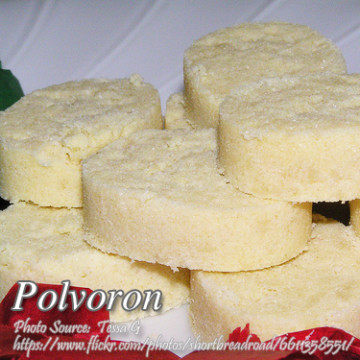
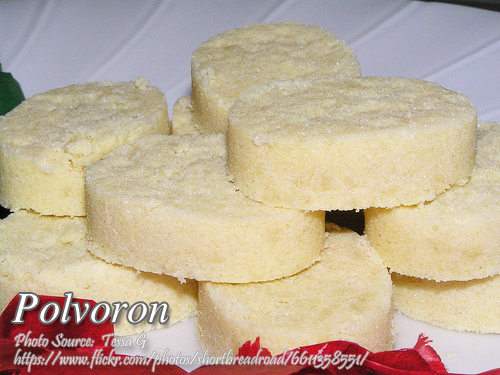
How to Make Polvoron (Filipino Shortbread)

Ingredients
- 1 cup cassava flour or all-purpose flour
- 1/4 cup powdered milk
- 1/3 cup sugar
- 5 tablespoons melted butter
Instructions
How to Make Polvoron:
- Toast flour in a heated skillet to light brown. Use a low medium flame to avoid burning.
- Mix sugar and powdered milk.
- Melt butter and add to the mixture.
- Mix thoroughly and mold in polvoron molder.
- Wrap individually in cellophane, if desired.
Notes
Toast the Flour Slowly
Toast the flour over low to medium heat and stir often so it browns evenly without scorching. The flour should develop a light golden color and a pleasant toasted aroma, not a dark brown color or burnt smell. Gentle heat works better because it gives the flour enough time to develop flavor while preventing bitter, burnt spots.Press the Mixture Firmly
When molding the polvoron, press the mixture firmly into the mold so the crumbs pack together and hold their shape. If the pieces crumble as soon as you remove them, the mixture likely needs more compression rather than more butter. A firm, even press creates compact pieces while keeping the delicate, crumbly texture that makes this Filipino shortbread special.Let It Cool Before Wrapping
Allow the molded pieces to cool and firm up before wrapping them individually in cellophane. Handling them too much while they are still warm can cause them to break because the butter has not fully settled into the mixture. Once completely cooled, they are easier to wrap and less likely to lose their shape during storage.
Leave a Reply